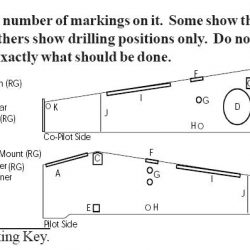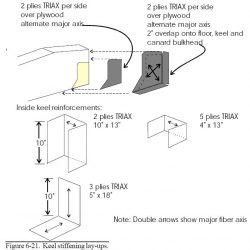
Keel Stiffening Lay-ups
Once the keel is installed, you need to do series of stiffening lay-ups with Tri-axial cloth. There are four inside the keel, one runs along the floor and up onto the canard bulkhead (3 plies of 5″x18″, running 10″ onto the bulkhead), one left to right (2 plies of 10″x13″ with the 10″ side running […]
Read More